

This is the fourth, and maybe the final version of my digital
wall clocks. I wanted to to retain all good features of version 3
and add some new. I also targeted to lower the cost of parts, as
the Maxim DS3231 is very expensive and the SAA1064 display drivers
were not too cheap either. So the LED drivers are replaced with
TLC5925, and RTC is changed to PCF2129. On circuit design the swap
of these parts was quick, but on FW side a little slower, as I had
to write the drivers.
You can see a presentation of the features on this video. The video
also compares the previous clock versions briefly.
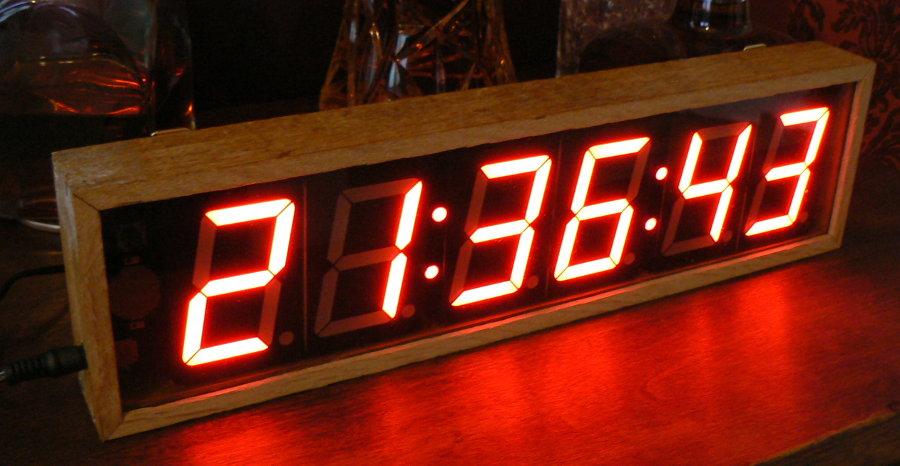
The version 4 uses same 58 mm (2.3") displays as version 3. There are compatible displays available from several manufacturers. The displays must be common anode type. Suitable displays are e.g. Sharlight CM1-2302 series, Kingbright SA23-11 series, Wenrun LSD230B series and also most of the 2.3" displays from eBay.
The best matching flat top LED for the cheap eBay displays that
I've found is Kingbright WP483SRSGW (or older code Kingbright
L-483SRSGW). This is actually bi-color LED but when mounted as in
assembly drawing, it lights red. When mounted the other way round,
it will light green. The green is a good match for Wenrun
LSD230BAG-101-01 green display which is available from TME at a
very affordable price. The picture on top of this page shows the
green Wenrun display. I've also used shrink tube around the LEDs
to prevent light leakage from side.
Previous clock used the internal temperature sensor of the DS3231
RTC to show temperature. This wasn't however giving accurate
readings since the power dissipated by displays and drivers was
heating the RTC. Version 4 has connectors to fit two external NTC
thermistors to measure inside and outside temperatures. Suitable
thermistors are available from eBay. They have 10 kohm
resistance beta value of 3950. The thermistors have an XH
connector at one end, which is a Chinese copy of JST
XH series connector. You can use either the genuine JST or
the Chinese replica on the PCB. According to my measurements these
thermistors follow very closely to this
chart on Adafruit website. I measured one thermistor in ice
water 31.87 kohm and in boiling water 652 ohm. The firmware has an
array based on the Adafruit table and in practice the displayed
temperature value seems to follow very closely to a commercial
digital thermometer.
The remote control support is improved. The firmware supports
Nec, Nec42, Samsung, SIRC, Kaseikyo, Matsushita, JVC and RC-5
protocols. It also has a learn function which can be used to teach
it to work with any remote which uses one of the supported
protocols. You can use e.g. an old TV or DVD remote control to
control the clock. The IR receiver should be chosen based on the
carrier frequency used by the protocol. SIRC uses 40 kHz, RC-5
uses 36 kHz and the rest use 38 kHz. However, the 38 kHz works
quite well also for SIRC and RC-5. An example of suitable 38 kHz
receiver is Vishay TSOP53438. It is cheap, sensitive and has good
noise rejection.
Time base of the clock is derived from PCF2129AT. It also
provides battery back-up. The power consumption of the RTC is 2.15
µA when in backup mode. A CR2032 battery has a typical capacity of
190 mA so it should last for over 10 years. Of course when clock
is getting power, the battery is not drained. The PCF2129AT is
temperature stabilized and the accuracy is very similar to DS3231
for only fraction of price.
A piezoelectric buzzer can be used to give audible alerts.
Currently there is possibility to configure it to hourly beep
and/or wake-up alarm. There is also an IR emitter LED which is
used in master / slave setup to transmit time and date from master
clock to slaves. It could also be used for alarm, so the clock
would e.g. turn on TV when the alarm activates, but this is not
currently supported.
There is also a footprint for U-blox CAM-M8 GPS / Glonass /
Galileo / BeiDou module. The firmware has automatic recognition
for GPS module and PCF2129 RTC. It works with eiher one, or both.
The firmware only uses the time and date from GPS, derived from
GPRMC message.
The schematics are pretty straight forward. The PIC16F1788
firmware makes most job.
Input voltage is fed to connector X1. It should be high enough to
be able to drive the chain of 4 LEDs in each segment. For red
displays this is typically around 7.5 V. Then the output stage of
TLC5925 needs an additional 1.0 V to maintain regulation. A 12 V
power supply is OK for most display types. To save some power, 9 V
supply is usually also OK. Voltages up to 17 V can be used (or up
to 16 V if using MCP1703-3302E/DB as regulator IC6), but this
causes just more power wasted and heat generated in the display
drivers. Diode D1 protects from incorrect supply polarity, but for
over voltage there is no protection.
The displays are driven by three TLC5925 constant current LED
drivers. They are controlled via SPI bus from PIC. The LED current
is set with a resistor in R-EXT pin on the TLC5925. Current at
each output is 18 times the R-EXT pin current. Now a little trick
is used to allow global brightness control of all segments. The
integrated DAC and integrated op-amp of PIC is used to control the
low sides of R-EXT resistors. This allows easy brightness control
without using PWM and without all the disadvantages associated
with PWM.
GPS module CAM-M8 is configured to use it's internal antenna, so
the only external component it needs is a bypass capacitor. It is
connected to the PIC via UART. Main purpose of the module on this
clock is to provide automatic and accurate time setting.
kello_v41.sch.pdf
11.9.2018 Circuit diagram v4.1
The PCB for the clock is designed using Cadsoft Eagle version
5.12. The design is double sided, and design rules are quite
relaxed. Most of the components are SMD and on bottom side of
board. Only the parts which need to be visible or are too high for
bottom side are on top. This minimizes board area since the
displays fill up the top side of board almost completely. Segment
order for display drivers is same as in previous version. It
allows simple routing of all segment signals in one layer. This
causes some more work in display driver source code, since the
segment order is different for the two displays controlled by one
chip.
You can order the boards from PCBWay from here.
When ordering, choose black solder mask. It makes the board less
visible and the clock looks very sleek if you use smoke tinted
plexiglass over it. Note that I haven't ordered the v4.1 boards
from PCBWay myself, I ordered those from another factory so I know
that the Gerber files should be OK. Please let me know if you
order the boards from PCBWay, so I can update info here to confirm
it works OK.
Note when ordering parts; you can save costs by leaving out
functions you don't need. Many of the parts can just be left out
without affecting other features of the clock. The GPS module is
the most expensive component and it doesn't bring that much
advantage because the PCF2129 is very accurate. On the other hand,
if you use GPS, you can leave PCF2129 and battery holder out. If
you use the master / slave functionality, the slave clocks don't
require either PCF2129 nor GPS since they will run from internal
PIC oscillator and get synced from master clock every minute. You
can also leave out IR LEDs and their drive components if you don't
need master / slave functionality, or leave out buzzer and drive
components if you don't need alarm / hour beep etc.
The Eagle design files and assembly drawing can be downloaded
below:
kello_hw_v41.zip
9.9.2018 Schematic and board file,
designed with Eagle 5.12. You can order the boards from PCBWay
using this
link.
kello_v41_assy_dwg.pdf
11.9.2018 Assembly drawing including bill of materials
The firmware for the clock is written with CCS PIC-C Compiler. The
source files package including compiled .HEX file are available
for download below.
The IR receiver code was originally based on San
Bergmans's NEC reveiver code and RC-5
receiver code. I have thus simplified them a bit and
converted to C. Also the RC-5 code is improved such that it syncs
the receiver on each received bit. This makes it much more
tolerable to different remotes which may have slightly different
timings. The JVC, Samsung, SIRC, Kaseikyo and Matsushita receiver
codes are written by me but basically they work with same
operating principle (timer interrupt driven state machine). I have
also added auto recognition, so the IR decoder state machine
identifies the code it receives and processes accordingly.
The GPS receiver code is based on code
from CCS customer forums code library posted by PICoHolic.
The code for Bosch BME280 temperature, atmospheric pressure and
relative humidity module comes with the CCS compiler. For PIC16
series of chips, the compiled code can be too big to fit in memory
segments if all code is inline. This can be solved by adding a
#separate directive before int32 _bme280_compensate_H_int32
function. This forces the compiler to realize this function as
separate, not inline, and allows the code to fit in the memory
segments. I also noticed that there was one incorrect register
address in the CCS provided driver, which was causing oversampling
settings not properly set. I have reported this to CCS so it will
probably get fixed in future. The fw v0.91 package below includes
a .diff file which can be used to patch the bme280.c file to fix
this bug and add the #separate directives.
All the rest of the code, including drivers for TLC5925 and
PCF2129 chips is developed by me. You can freely use and modify
them for your own use, but use of them for commercial purposes is
prohibited without written permission from me. You can find
contact info at beginning of the source files or at bottom of this
web page.
Assembling the PCB is quite straightforward. It is best to begin
from bottom side (back side), which has the surface mount
components. The component packages are chosen with DIY in mind,
having comfortably big pin spacing. If you have previous
experience from soldering SMD components, you should be just fine.
As usual, begin from the passive components and then ICs and
transistors.
On top side it is best to solder first other components than
displays and clock colon LEDs. Solder them in order of height,
from lowest to tallest. For the 7-segments displays and LEDs there
are a few tricks to make them look nicer. If you have 7-segment
displays which have black face but white sides, the white sides
are visible even behind a tinted acrylic window. You can use e.g.
black permanent marker or black electrical tape to mask the sides
of the displays. If using permanent marker, it is best done before
soldering the displays. Also, the clock colon LEDs look nicer if
you put shrink tubing around them, so that light only comes out
from top of the LED. It is best to solder the LEDs in place last,
so you can adjust the height to match the 7-segment modules. Below
is an example of LED and display masking.

After successful programming, you should finally see something on
the displays.
Maybe the biggest effort in my clock projects has been the
enclosure. I have used several approaches. I have used the
ready-made Velleman B8009 enclosure with clock versions one and two.
I have built wooden
enclosures and aluminum enclosures with smoke tinted lexan
windows. I have used a photoframe to enclosure the big v4 clock
with 5" seven segment displays. I have designed a sheet metal
enclosure with a sliding acrylic window with mechanical CAD
software. It would be cheap to manufacture in big volumes, but NRE
cost is too high for hobby projects. All these designs serve their
purpose well and even look nice, but they are either labor
intensive or expensive.
Laser cutting has gained popularity, and there are many companies
which offer laser cut services online. In Finland, you can even
use laser cutting machines in some public libraries for free.
PMMA is cheap and cuts nicely with laser. PMMA is also known as
acrylic, or by it's common trade names Plexiglass or Perspex. The
easiest way is to order from some online service, you just supply
the cut files and choose material. I have used Razorlab make the parts
shown in photo below. The material is 3 mm thick opaque black
acrylic for the back panel, and transparent grey tint acrylic for
the front panel. You could also make the back panel from same
transparent material as front panel, as it is a bit cheaper to use
only one material.
I have tested to use transparent red and transparent green PMMA
enclosures as well. The green PMMA form Razorlab has deep green
color (maybe closer to blue than yellow), so it needs displays
with matching pure green color. Many of the green 7-segment
displays are yellowish green, and the brightness is reduced
because of tone mismatch. You can download the design file in SVG
format below:
kello_v4_enclosure_razorlab.svg
Acrylic enclosure design file in .svg format. Designed with
Inkscape.
kello_v4_enclosure_razorlab
- RL1.svg Same design as above, but svg is
optimised by Razorlab. Parallel lines have been joined to reduce
cuts.
Note that if you open the optimized design with
Inkscape, it looks that it is only 75% of the intended size.
This is because it has been edited in Adobe Illustrator. If you
use these files to order from Razorlab, I recommend to mention
that the design has two parts which both are 360x80mm, thus the
whole design is 360x160 mm.
In addition to the acrylic panels, you also need some screws and
spacers. See parts list below.
| Description |
TME part number |
Qty |
| M3x6 button head screw |
B3X6/BN19 for black finish M3X6/ISO7380-1-A2 for natural finish |
16 |
| M3x8mm spacers with internal thread | TFF-M3X8/DR124 | 8 |
| M3x12mm spacer screws with internal and external threads | B3X12/BN3318 | 4 |
| M3 plain washer |
B3/BN1414 | 4 |

The firmware implements a menu system which allows to select a
desired display mode and also to setup the various configurable
functions. You can move in the menu system using the 5-way
directional switch on the PCB or with an IR remote control. Below
is diagram of the menu structure as it is in firmware v1.22. Click
the image to download it as PDF.

When you have succesfully programmed the clock, it's time to
setup it. First you probably want to teach the clock your remote
control. If not, you can skip to next chapter. Use the 5-way
directional switch to navigate to setup menu, and from there to
remote menu. You can use the diagram above as guidance. It's best
first to test your remote whether is uses a coding which the clock
supports. Go to 'identify' display which shows the IR remote
control protocol, if it is identified. Press your remote control
buttons. The following codings are currently supported:
If you are unlucky, the display shows 'Error', which means that
the remote control coding is not recognized. Try to find another
remote. If display stays at 'nonE', it might be that your remote
is not an IR remote at all, or more likely, has dead batteries.
Try if using fresh batteries help. Nearly empty batteries can also
sometimes be reason to get 'Error', if the remote signal is too
weak to be properly recognized.
When you have identified a remote which is recognized by the
clock, you can teach it. Navigate to 'LEArn' in remote menu. The
clock will display the eight button names one after another. 'UP',
'doWn', 'LEFt', 'riGht', 'bUtton', 'PoWEr', 'toGGLE' and 'briGht'.
Press a desired key in your remote to teach it. If your remote
doesn't work here for some reason and you can't proceed, you can
exit learn mode by pressing 5-way directional button. The last
three buttons aren't mandatory. You can press here same remote
button as you used for 'bUtton' to skip those optional buttons you
don't want to program. You can also press 5-way directional
switch, which skips all optional buttons and saves just the five
compulsory ones.
Now you should have a working remote control. If there is a
problem, try to learn it again. If it doesn't help, you can go to
'Shocod' which will display the remote control address and command
for each remote control button. The first four digits show address
in hexadecimal. The last two digits show the command. Ensure that
all the buttons you are going to use transmit the same address, as
this is what the clock expects.
There are already three possible time sources for the clock; the PCF2129 RTC, the U-Blox GPS module and time reception from master clock via IR messages. The PCF2129 RTC is very accurate and enough in most cases.
The U-Blox GPS module is quite expensive, and in many cases a bit
overkill. The GPS reception can also be problematic indoors.
One alternative is to use internet time from NTP timeserver. I was
thinking of implementing a NTP to GPS time bridge using ESP8266.
Fortunately I did a web search first, and found this excellent fakeGPS project
by SnowHead which does exactly that. I had to make some changes to
the code. This modified code sends
time as GPRMC message each second, just like the U-Blox GPS
module. I've also changed it to send the 'A' or 'V' which in GPRMC
message indicates whether GPS has fix. If the ESP8266 hasn't been
able to udpate time from NTP server within the last hour, it will
indicate this as 'no fix'. This prevents the clock from saving
possibly inaccurate time to RTC. I recommend to use the v1.20 or
later firmware for clock, as there are some changes to improve
operation with fakeGPS.
See the fakeGPS github page for required libraries and setup etc.
I have left the daylight savings time code into the sketch. But at
least in Europe you don't need to make any changes in the code. It
is by default set to GMT, as GPS time always is. You just need to
set the timezone and daylight savings time in clock setup menu. If
your country has different dst rules, you can enter them into the
sketch before compiling.
I have tested the fakeGPS with NodeMCU and ESP-01. Both work OK.
With ESP-01, remember that you must connect EN pin (6) to 3v3 pin
(8). You'll need 3 wires for connection to clock:
The ESP current draw when WiFi transmission is active could be a
bit high for the SOT223 case regulator. But in practice it seems
to run OK, as the amount of WiFi transfers is small. You can also
use separate power supply for the ESP module, and only connect GND
and TX to clock.
page created 25.12.2017
last updated 20.7.2025 webmaster@kair.us
kair.us/ projects/ seven segment wall clocks/ kello version 4