

j_ace_circuit_diagram.pdf
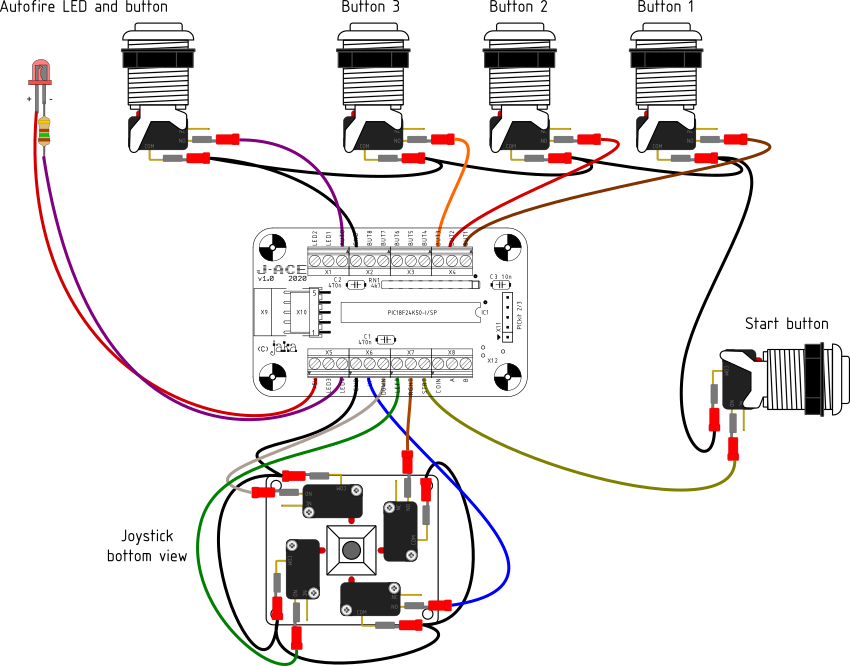
Just what the file name says. It's a circuit
diagram!
j_ace_assembly_drawing.pdf
J-ACE assembly drawing and bill of materials. Includes order codes
for TME, Digi-Key and Mouser.
j_ace_hw.zip
Eagle 5.12 schematic and board
files for J-ACE
j_ace_gerber.zip
Gerber files. You can
order 10 pcs of these boards from PCBWay using
this link.
j_ace_fw_v07.zip
J-ACE Firmware v0.7. Includes source files and compiled binaries
for both keyboard and joystick modes
j_ace_fw_v08.zip
J-ACE Firmware v0.8. Heavy optimizations in many functions to
minimize lag to absolute minimum. Special thanks to WydD
for creating lag measurement setup!
This chapter describes the steps required to build a J-ACE. It
assumes you have basic electronics tools and know how to use them.
Order the parts which are listed in the BOM. Note that you
probably don't need connector X10. To make it easier, I have
gathered a TME
shared cart, a Digikey shared cart
and a Mouser
shared cart which have all the required components except
the PCB.
You can order a batch of 10 boards for $5 + shipping (approx. $13
total) from PCBWay using this
link. If you haven't yet registered to
PCBWay, you can register
via this link. It gives me some PCBWay credit, and also
you should get some free bonus in addition to the $5 initial
credit which PCBWay nowadays gives for all new users anyway. You
can also use the Gerber
package and order boards from your favorite manufacturer.
If you don't have a PIC programmer or don't have a place/friend
where it could be programmed, the cheapest option is to buy a
PICkit2 or PICkit3. Also the cheap Chinese clones e.g. from eBay
will usually work.
Assembling the PCB is very straightforward job. Component
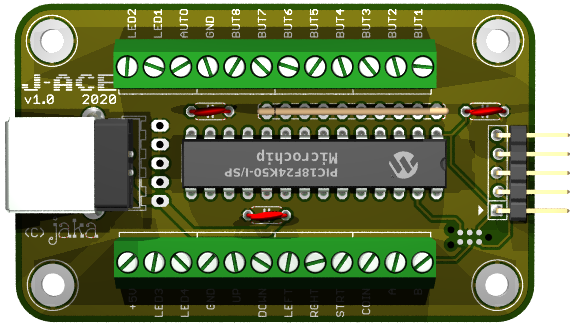
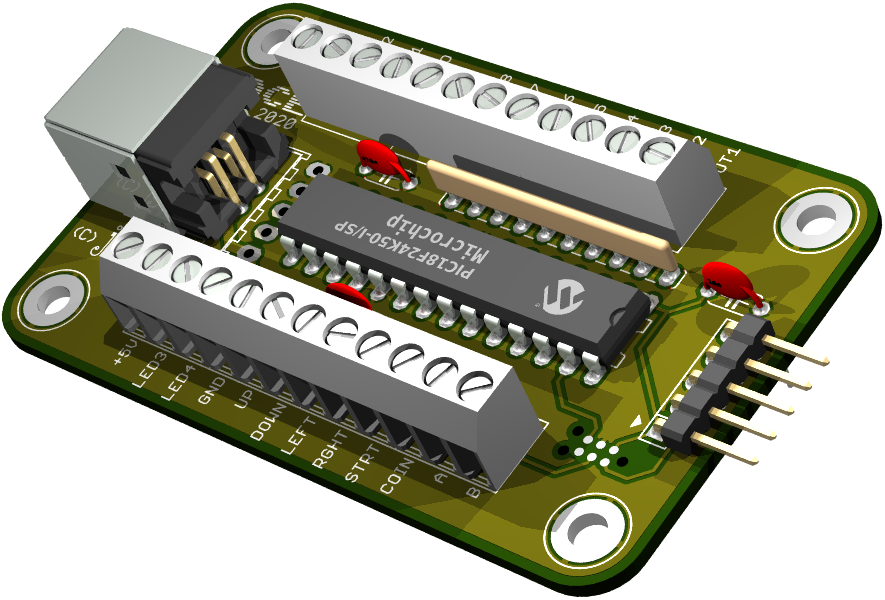
locations are marked on silkscreen, but you can also use this assembly drawing to find
which part goes where. Components IC1 and RN1 need to be mounted
with correct orientation. Pin 1 is marked with a dot or notch,
they have to match the assembly drawing. Screw terminals need to
be attached to each other before soldering.
Download the latest firmware.
Information on how to program the PIC, see here.
The most common use for J-ACE is an arcade stick or arcade
cabinet. I won't go into details of construction an arcade stick,
there are lots of resources available on the internet. I have
drawn a wiring diagram how to connect joystick, buttons and LEDs
to J-ACE, see below. This example wiring diagram has joystick,
three action buttons, start button, autofire button and autofire
LED. The diagram shows a separate LED, but usually you would use
an illuminated arcade button for autofire button. Then LED wiring
would go to LED terminals of the illuminated button. Just choose
an illuminated button with 5V LED. You can add illumination to iL
PSL translucent arcade buttons with my button led boards.

The J-ACE will be recognized either as three standard HID boot
protocol keyboards or as one HID compatible game controller,
depending on which firmware is loaded. It doesn't require any
drivers.
When used with keyboard firmware, you can use it pretty much
directly with MAME. On Retropie, you have to configure it like any
keyboard on the first boot.
With joystick firmware, you usually need to select J-ACE from the
emulator. You don't need to do any calibration as was required
with old analog PC joysticks.
To test operation of J-ACE in keyboard mode, you could use a text
editor, but it doesn't tell the complete truth. The best way is to
use a keyboard test application. One example is Aqua's
Key Test (here's a local copy).
This kind of application can show correct operation of multiple
simultaneous key presses (referred to as N-key rollover or NKRO).
They can also separate left and right ctrl, alt and shift keys. If
you know a good keyboard test software for Linux or Mac, let me
know.
Another possibility is online keyboard test, such as key-test.ru or keyboardchecker.com. They
can also show simultaneous keypresses but they can't separate left
and right ctrl, alt and shift.
To test operation of J-ACE in joystick mode, you can use the
tools provided by operating system.
On modern Windows versions, the joystick calibration application
can't be easily found from the control panel. But it still is
there, you can run it by pressing Win+R and type joy.cpl and hit
enter. Or on Windows 10 just open the start menu and type joy.cpl.
On Linux systems you can use e.g. jstest command line tool.
The J-ACE uses a bootloader, so the PIC programmer is not
required for updates. The bootloader also allows to change between
keyboard and joystick mode firmware. You can enter the bootloader
mode by keeping autofire button pressed down when connecting the
USB cable. You can then use the update tools suggested on the my USB HID bootloader page.
Many joysticks in '80s were equipped with autofire, sometimes
referred to as rapidfire. It repeatedly presses fire button at
high rate, which eliminates manual button mashing in shoot-em up
games. It eases stress on your fingers and allows to concentrate
on controlling of the character and avoiding enemy bullets.
The J-ACE has a dedicated Autofire button. It is recommended to
also connect an autofire LED.
Autofire mode is activated by pressing the autofire button. The
autofire LED is lit, which indicates that autofire is on. Now when
you keep button pressed down, the J-ACE repeatedly presses and
releases it, at a predefined rate. The autofire LED flashes at
same frequency, giving a visual indication of the fire rate.
Pressing the autofire button again disables autofire mode.
You can enter autofire setup mode by keeping autofire button
pressed down for more than 1 second. The autofire setup mode is
indicated by the autofire LED which blinks at the current firing
rate. You can increase the firing rate by moving joystick up and
decrease it by moving joystick down. There are five speed
settings, which are: 4 cps, 8 cps, 16 cps, 31 cps and 63 cps. Cps
means clicks per second. At the fastest rate, you probably can't
see anymore that the autofire LED is flashing, but it seems to be
constantly lit.
You can also configure which buttons have autofire enabled. When
exiting autofire config mode, keep those buttons pressed down,
then press the autofire button shortly. When you now press the
autofire button, the autofire is activated to those buttons. All
the other buttons behave normally.
Note that if you use the Aqua's Key Test or Windows joystick test
app, they can't show the fastest autofire rates correctly. But the
actual fire rate still is correct. You can see this if you test
e.g. on Notepad how many characters you can get per second (in
keyboard mode, of course).
The keyboard mode of J-ACE has four preconfigured keymaps. This
allows you to connect four J-ACE based controllers simultaneously
and enables four player gaming. You can change the keymap by
keeping button 1 pressed down when connecting USB cable. This
enters the keymap selection mode. The mode is indicated by
flashing all the connected LEDs. Now you can select the desired
keymap with joystick. Keep the joystick pointing at desired
direction and press button 1.
Currently the keymaps are fixed. The keycodes for different maps are shown in table below:
| Input |
Player 1 |
Player 2 |
Player 3 |
Player 4 |
Shift (hold start button, only on player 1 keymap) |
| Button 1 |
Left Ctrl |
A |
Right Ctrl |
B |
5 |
| Button 2 |
Left Alt |
S |
Right Shift |
E |
Esc |
| Button 3 |
Space |
Q |
Enter |
H |
Space |
| Button 4 |
Left Shift |
W |
O |
M |
Left Shift |
| Button 5 |
Z |
I |
F1 |
F7 |
Z |
| Button 6 |
X |
K |
F2 |
F8 |
X |
| Button 7 |
C |
J |
F3 |
F9 |
V |
| Button 8 |
V |
L |
F4 |
F10 |
C |
| Joystick UP |
arrow UP |
R |
I |
Y |
key above Tab |
| Joystick DOWN |
arrow DOWN |
F |
K |
N |
P |
| Joystick LEFT |
arrow LEFT |
D |
J |
V |
Enter |
| Joystick RIGHT |
arrow RIGHT |
G |
L |
U |
Tab |
| Start button |
1 |
2 |
3 |
4 |
none |
| Coin acceptor/button |
5 |
6 |
7 |
8 |
5 |
| Button A |
P |
Tab |
F5 |
F11 |
P |
| Button B |
Enter |
Esc |
F6 |
F12 |
Enter |
Shift function is similar to shift in keyboard. It changes what
other buttons do. J-ACE uses start button as shift. The shift
function allows to build a mame controller with fewer buttons, as
you don't necessarily have to use dedicated buttons for e.g. coin
acceptor or other emulator related buttons. The shift function
makes the start button behave a little differently. The normal
start button keycode is sent when you release the start button,
not when you press it down. If you have used the start button as
shift to send some other keycodes, then the normal start button
keycode is not sent at all.
The shift function is only available when J-ACE is configured to
player 1 keymap. The alternative keycodes sent with shift function
are showed in table above.
The joystick mode also implements the shift function. If you want
to disable the shift function in joystick mode, look at keymap
configuration instructions. The same configuration mode is
available in joystick firmware as well. The shift is enabled when
configured as player 1. The keymap configuration mode with
joystick firmware doesn't have any other effect than enabling or
disabling the shift function.